Being Cheap is Easy: Chocolate
Showing posts with label Chocolate. Show all posts

Healthy Snack: Banana Cocoa Muffins

May 12, 2015

Healthy Snacks, Breakfast Muffins, Chocolate Muffins, Bananas, Overripe Bananas

Last night, it was actually cool enough to bake.  We have super high ceilings and even with the air on, our house gets like 80 degrees with the oven on.  So frustrating in the warmer months! Something about a rainy day makes me want to cook and bake...I always make soup and bread.

Fudgy Healthified S'Mores Brownies + Hamilton Beach Giveaways!

June 08, 2014

Disclosure: I am a Hamilton Beach brand ambassador and I received free products for review.  All opinions and tasty recipes are my own!
In my house growing up, my Mom was the best cook.  We were a family who sat down every night for dinner together to catch up on what happened that day.   My favorites were her spaghetti sauce, fried chicken and chicken enchiladas. I definitely got my cooking bug from her.  (Thanks Mom!)

When it came to baking, that was my Dad's niche.  Especially chocolate chip cookies!  Also, for Christmas baking, my Dad typically takes over.  To this day, I use the same cookie recipe and my girls love to have cookies at Grandma & Grandpa's.

You all know I love to healthify recipes and last week I came up with one by accident.  It seems that happens quite often!  I was craving brownies while Ricky was at work and I realized I only had egg whites and I remembered reading that you could sub black beans instead of eggs + oil (thank you Pinterest!).  I went through the pantry and voila! This recipe came about.  Yes, they are still a "sometimes food" as we call it...but at least they are a tad bit healthier!

My Dad is supposed to watch his sugar intake and I think I could make these without him noticing the difference!

These brownies came out fudgy, gooey and perfect for any special occasion.  Or if you get home from work before a party and realize "crap, I need to bring something!".  You can whip these up in less than an hour and be the star of a party.  Or if you want to binge watch Orange is the New Black and not feel guilty... (Season 2 is SO good!).

I also have a new giveaway for you! Hamilton Beach send us two awesome mixers to try.  The first one is a stand mixer which we've made our favorite pizza dough  with and it turned out perfectly!  We also got a hand mixer with soft scrape blades which I can make whipped potatoes in my pot without worrying about scrapes!
So are you brave enough to try these black bean brownies?  Olivia said "Black bean brownies? Mama you're CRAZY!"...but she gobbled them up!

Here's what you need:
  • 1 box of your favorite brownie mix (We used the Fudgy brownies from Aldi!)
  • 1 can of reduced sodium black beans, pureed (NOT drained!)
  • 2 cups of Vanilla Wafers OR 1 sleeve of graham crackers
  • 2 tablespoons coconut oil
  • 1.5 cups mini marshmallows
  1. Pour entire can of black beans in a chopper/blender. DO NOT drain! Puree until smooth.  Set aside.
  2. Preheat oven to 375. Crush up crackers by hand or in a chopper.  Add coconut oil and mix together.  Press on the bottom of a 9x13 pan.  Bake for 5-7 minutes, until slightly golden. 
  3. Meanwhile, in a large bowl (or stand mixer), mix up brownie mix with black bean puree.  Pour over cracker crust in 9x13 pan.
  4. Bake for 20 minutes.  Top with marshmallows and bake an additional 8-10 minutes, until golden brown.
  5. Let cool for at least 15 minutes.  
I found that these got better the next day!
Now here's for the fun part! Enter the giveaway below for a chance to win one of TWO Hamilton Beach mixers!

a Rafflecopter giveaway

Cookie Swap 2013: Cocoa Chewy Gooey Cookies

December 11, 2013

#fbcookieswap

If you're looking for a pretty, delicate cookie, this might not be for you.  This recipe is a combination of a few things.  First of all, last October Stefanie at Sarcastic Cooking (you have to follow her blog, the recipes are ah-mazing) posted this recipe and we've been obsessed.  I'd never thought to put Corn Flakes in a cookie before! Normally we make the traditional green cornflake wreaths, but I thought I should just make cookies!  Last spring, I found some mint chocolate marshmallows on clearance (they're still good, lol) and I had to use them!  So here we are: cocoa, marshmallow, Corn Flake and chocolate cookies. I decided to call them Cocoa Chewy Gooey Cookies, since it makes the girls smile.  

Here's what you need:
  • 1 cup of coconut butter (or 2 sticks of butter)
  • 1 cup of sugar
  • 2/3 cup of brown sugar, packed
  •  1 egg
  • 1/2 cup cocoa powder (Trader Joe's mint cocoa is awesome too!)
  • 1 teaspoon vanilla extract
  • 1.5 cups of flour
  • 1 teaspoon coarse salt
  • 1/2 teaspoon baking powder
  • 1/4 teaspoon baking soda
  • 3 cups Corn Flakes (Don't substitute Special K, I tried...no bueno)
  • 1 cup milk chocolate chips
  • 1.5 cups mint chocolate marshmallows (or plain mini)
Let's Bake!

  1. I highly recommend a stand mixer, but a hand one will work too!  Use the paddle attachment.  Add butter and sugars.  After about 3 minutes of mixing, scrape down the sides, and add egg, cocoa and vanilla. Mix for another 4 minutes. (If you are hand mixing, this totally counts as a workout!)
  2. In a small bowl (I like to use a clean quart yogurt container) mix flour, salt, baking powder, and baking soda.  Scrape down the sides of the bowl and add flour mixture.  Mix on low for no more than a minute. 
  3. Add the cornflakes, chocolate chips, and marshmallows. Mix together just until combined.
  4. Line a large baking sheet with parchment paper (or a Silpat, which is on my Christmas dream list!).
  5. Using a 1/4 cup measuring cup, scoop out portions of dough and place them on the parchment. Cover the cookies and press the dough down so it is more of a flat disc. Refrigerate the dough for at least one hour.
  6. Preheat the oven to 375.
  7. Line additional baking sheets with parchment paper.
  8. Place dough on cookie sheets, leaving 2 inches in between since they spread out.  Bake cookies for 10-13 minutes, until the edges become lightly golden.
  9. Let the cookies cool for a bit, before putting on cooling racks. Cookies will continue to harden as they cool.
Makes about 2 dozen cookies...if you don't eat the dough like I do. 


These are addicting!  I love the chocolaty, chewy, crunchy, gooey combo...plus the subtle mint flavor.  Mmmm, mmm! Santa would love these too.

#fbcookieswap
What do you have baking this season?  Recipes please! 

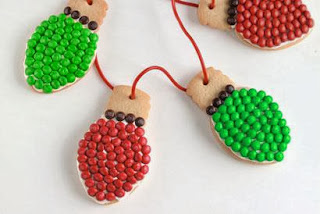
Better Baking with M&Ms! {Coupon alert!!}

December 02, 2013

I am a member of the Collective Bias®  Social Fabric® Community.  This shop has been compensated as part of a social shopper insights study for Collective Bias and its client.

#BakingIdeas


Want to impress your friends with your baking skills?  Bake a dessert that will be the highlight of every meal with M&M's® chocolate candies!   

Print out your coupon, buy some M&M's® at Walmart, and pre-heat the oven, because whether you have an office or class party, or just want to treat your family, it's time to get out the oven mitts and start baking! #BakingIdeas

I like to keep M&Ms on hand for a quick dessert or snack.  Cookie bars can be whipped up in less than 30 minutes.  

Need some fresh M&M ideas?  Check out the Bright Ideas website! 

http://www.brightideas.com/bright_idea.aspx?ID=87 http://www.brightideas.com/bright_idea.aspx?ID=34

What do you bake with M&Ms?! I'm always looking for new ideas.  Enjoy the coupon!
 
FREE BLOGGER TEMPLATE BY DESIGNER BLOGS